
If you've been in the custom apparel game for even a short time, you've likely heard about DTF transfers. This printing method has taken the industry by storm, and for good reason. Unlike traditional vinyl or screen printing, DTF transfers offer incredible versatility, vibrant colors, and a soft feel that customers love. But what exactly are they, and how can you use them to elevate your designs? In this guide, I'll walk you through everything you need to know about DTF transfers, from the basics to advanced tips that I've learned from years of hands-on experience.
What Are DTF Transfers?
DTF stands for Direct to Film. It's a printing technique where your design is printed onto a special film, coated with a powder adhesive, and then heat-pressed onto the fabric. The result is a durable, stretchable print that bonds seamlessly with the material. Unlike DTG (Direct to Garment) printing, which requires the garment to be pre-treated and can be finicky on dark colors, DTF transfers work on virtually any fabric, including cotton, polyester, blends, and even leather. This makes them a game-changer for small businesses and hobbyists alike.
Why Choose DTF Transfers?
There are several reasons why DTF transfers have become a go-to for many in the custom apparel industry. First, the color vibrancy is unmatched. Because the design is printed on film and then transferred, you get bright, opaque colors even on dark garments without the need for a white underbase. Second, the detail is exceptional: fine lines, small text, and intricate gradients all come out crisp. Third, DTF transfers are incredibly durable. When applied correctly, they can withstand dozens of washes without fading or cracking. Finally, they're cost-effective for small runs. You don't need screens or plates, so short orders are affordable.
How DTF Transfers Work: Step by Step
Understanding the process helps you troubleshoot and get better results. Here's a breakdown of the DTF transfer workflow.
1. Design Preparation
Start with a high-resolution image. DTF printers typically use CMYK plus white ink, so your design should be in RGB or CMYK color mode. Make sure to mirror the design horizontally before printing, as you'll be pressing it face-down onto the fabric.
2. Printing
The design is printed onto a special PET film. First, a layer of white ink is printed as a base (unless you're using a printer with a different configuration), followed by the color layers. The white ink acts as an adhesive and also makes the colors pop on dark fabrics.
3. Powdering
While the ink is still wet, a hot-melt adhesive powder is applied evenly over the printed area. The excess powder is shaken off, and the film is then cured in an oven or with a heat press to melt the powder and set the ink.
4. Transferring
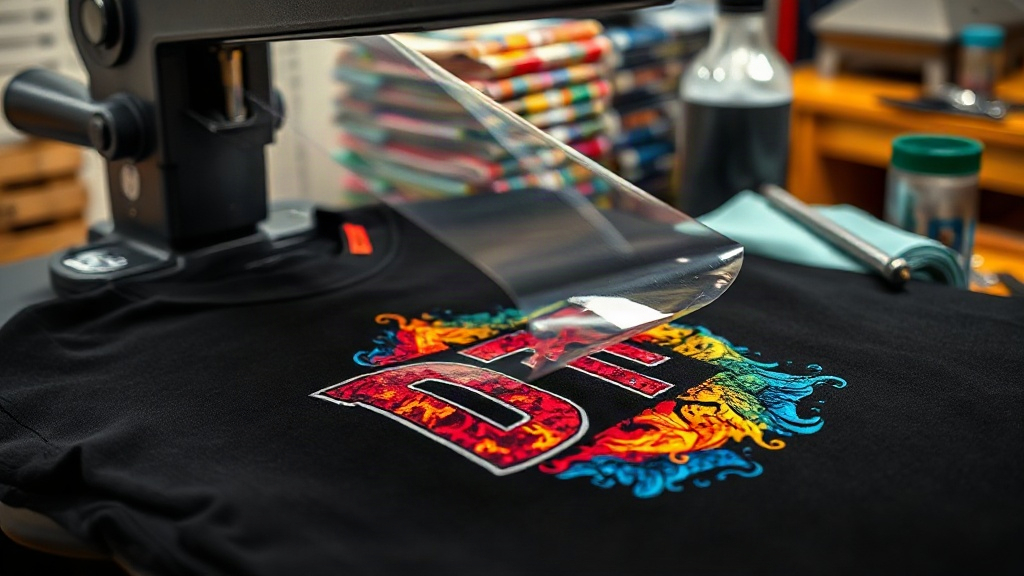
Once cured, the transfer is ready to be applied. You place it on the garment, cover it with a protective sheet, and press it with a heat press at around 300-325°F for 10-15 seconds. After pressing, you peel the film off (hot or cold peel depending on the film type). The design remains on the fabric, with the adhesive bonded to the fibers.
Choosing the Right DTF Transfer Supplies
Not all DTF supplies are created equal. Here's what to look for:
- Film: Look for double-sided matte film that is compatible with your printer. It should have a coating that holds the ink and releases cleanly.
- Ink: Use high-quality DTF inks designed for your printer. Cheap inks can clog printheads and produce dull colors.
- Powder: Choose a fine, consistent adhesive powder. The particle size affects how well it bonds and feels on the fabric.
- Heat press: A reliable heat press with accurate temperature and pressure control is essential. You can also use a dedicated DTF transfer press.
Common Mistakes and How to Avoid Them
Even with the best supplies, things can go wrong. Here are some pitfalls I've encountered and how to steer clear:
- Not enough pressure: If the transfer doesn't adhere properly, it may peel off after washing. Ensure your heat press applies even, firm pressure.
- Incorrect temperature: Too low, and the powder won't melt; too high, and you'll scorch the fabric or film. Always test with a scrap piece.
- Peeling too soon or too late: Follow the film manufacturer's instructions for hot peel vs. cold peel. Peeling at the wrong time can distort the design.
- Poor powder application: If powder isn't applied evenly, you'll get weak spots. Use a powder shaker for consistency.
DTF Transfers vs. Other Printing Methods
How do DTF transfers stack up against other popular methods?
- DTG: DTG is great for 100% cotton and offers a soft feel, but it requires pretreatment and can be inconsistent on dark colors. DTF works on more fabrics and has better opacity.
- Screen Printing: Screen printing is cost-effective for large orders but requires setup and is limited in color complexity. DTF shines for small batches and full-color designs.
- Vinyl: Heat transfer vinyl is easy for simple designs but can't handle gradients or fine details. DTF handles intricate artwork with ease.
- Sublimation: Sublimation only works on polyester and light-colored fabrics. DTF works on almost anything.
Applications of DTF Transfers
DTF transfers aren't just for t-shirts. They're used on hoodies, tote bags, caps, denim jackets, and even shoes. Because they stretch and bond well, they're ideal for activewear. I've also seen them used on home textiles like pillowcases and aprons. The possibilities are endless.
Tips for Long-Lasting DTF Prints
To ensure your DTF prints stand the test of time, follow these tips:
- Wash garments inside out in cold water.
- Avoid fabric softeners and bleach.
- Tumble dry on low or hang dry.
- Iron on the reverse side, never directly on the print.
- Wait at least 24 hours after pressing before washing.
Frequently Asked Questions
What fabrics can I use with DTF transfers?
DTF transfers work on a wide range of fabrics, including cotton, polyester, blends, nylon, leather, and even treated wood. They are not recommended for fabrics with a heavy texture or those that cannot withstand heat.
How long do DTF transfers last?
With proper application and care, DTF transfers can last as long as the garment itself. They are resistant to cracking, peeling, and fading, often outlasting other decoration methods.
Do I need a special printer for DTF transfers?
Yes, you need a DTF printer that uses DTF inks and can print white ink. However, you can also buy pre-printed DTF transfers from suppliers if you don't want to invest in a printer.
Can I use a regular heat press for DTF transfers?
Yes, a standard heat press works fine as long as it can reach the required temperature and pressure. Some people use a home iron, but results are less consistent.
Is DTF printing cost-effective for small orders?
Absolutely. DTF transfers have low setup costs, making them ideal for small batches and one-off designs. The per-unit cost is higher than screen printing for large runs, but for short runs, it's very economical.
Final Thoughts
DTF transfers have revolutionized the custom apparel industry by offering unparalleled versatility and quality. Whether you're a seasoned pro or just starting, mastering DTF transfers can open up new creative and business opportunities. Remember to invest in quality supplies, follow best practices, and always test before a big order. With a little practice, you'll be producing stunning, durable prints that your customers will love.