
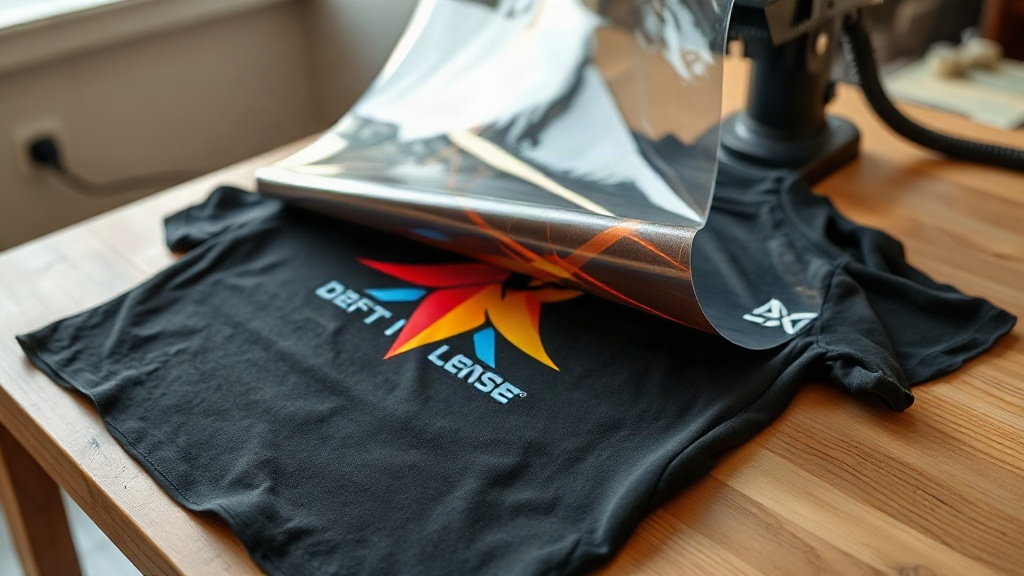
When you first hear about DTF printing, you might wonder what all the buzz is about. Direct-to-film printing is quickly becoming a favorite among crafters and small business owners for its versatility and vibrant results. Unlike other methods, DTF lets you transfer full-color designs onto almost any fabric with impressive durability. In this guide, I'll walk you through the entire process, share insider tips, and help you avoid common pitfalls. Whether you're a complete newbie or looking to expand your skills, this article will give you the confidence to try DTF printing yourself.
What Exactly Is DTF Printing?
DTF stands for Direct-to-Film. It's a printing technique where your design is printed onto a special transfer film, coated with a adhesive powder, and then heat-pressed onto the fabric. The magic lies in the adhesive powder, which melts and bonds the ink to the material. This method works on cotton, polyester, blends, and even tricky fabrics like nylon. Plus, you don't need to pre-treat the garment, which saves time and mess.
Why Choose DTF Over Other Printing Methods?
You might be familiar with DTG (Direct-to-Garment) or vinyl, but DTF offers unique advantages. For starters, it's incredibly cost-effective for small batches. You can print multiple designs on a single film sheet, reducing waste. Also, the color vibrancy is outstanding, especially on dark fabrics where other methods might struggle. And because the transfer is flexible, it won't crack or peel easily if applied correctly. I've seen DTF prints survive dozens of washes without fading, which is a testament to its durability.
The DTF Printing Process Step by Step
Getting started with DTF printing is straightforward once you have the right equipment. Here's a breakdown of the steps.
1. Prepare Your Design
First, create or source your artwork. Remember that DTF requires mirrored images because you'll be pressing the film face-down onto the fabric. Use design software to flip your image horizontally. Also, ensure your design is high-resolution (300 DPI is ideal) to avoid pixelation. If you're using text, make sure it's legible and not too thin, as fine lines may not transfer well.
2. Print on DTF Film
Load your DTF film into a compatible printer. Most people use modified inkjet printers with DTF inks, or dedicated DTF printers. The film has a coated side where the ink adheres. Print your design onto the coated side. You'll notice the print looks dull initially; that's normal because the white ink layer goes underneath the colors to make them pop on dark garments.
3. Apply Adhesive Powder
While the ink is still wet, sprinkle the adhesive powder evenly over the print. Then, shake off the excess. You can use a powder shaker for better control. The powder should stick only to the wet ink. This step is crucial because the powder creates the bond between the ink and the fabric during heat pressing.
4. Cure the Powder
Place the film in a heat press or oven to melt the powder. Typically, you'll cure at around 160°C (320°F) for 2-3 minutes. The powder will turn from white to a glossy, clear finish. This indicates it's properly melted. Be careful not to over-cure, as it can burn the film.
5. Heat Press onto Fabric
Set your heat press to 160-170°C (320-340°F) with medium pressure. Place the transfer film onto the garment with the design facing up (or down, depending on the film type). Press for 15-20 seconds. Then, wait for it to cool completely before peeling off the film. Cold peel gives the best results for DTF transfers.
Essential Supplies for DTF Printing
To get started, you'll need:
- A DTF printer or a converted inkjet printer with DTF ink
- DTF transfer film (sheets or rolls)
- Adhesive powder (usually TPU-based)
- Heat press (or a reliable iron with consistent pressure)
- Design software (Photoshop, Illustrator, or free alternatives like GIMP)
- Powder shaker and curing oven (optional but helpful)
Tips for Flawless DTF Transfers
Even with the right equipment, small mistakes can ruin your print. Here are some hard-earned lessons from my own trials.
- Always mirror your design. It's easy to forget, and you'll end up with backwards text.
- Control humidity. High humidity can cause the powder to clump, leading to uneven adhesion. Work in a dry environment.
- Test your heat press settings. Every press is different. Use a temperature gun to verify the actual platen temperature.
- Use a Teflon sheet or parchment paper. This protects your heat press and prevents the film from sticking.
- Wash garments inside out. To extend the life of your DTF prints, advise customers to wash inside out in cold water and avoid bleach.
Common DTF Problems and How to Fix Them
If your transfer peels or cracks, it's usually due to insufficient pressure, incorrect temperature, or not enough powder. Increase pressure and ensure even coverage. If colors look faded, you might need to adjust your printer's color profile or add more white ink. For film that won't release, try cooling longer before peeling.
DTF vs. Other Printing Methods: A Quick Comparison
How does DTF stack up against DTG, vinyl, and screen printing? DTF wins for complex, multi-color designs on various fabrics without pre-treatment. DTG is great for 100% cotton but struggles on synthetics. Vinyl is cost-effective for simple one-color designs but limited in detail. Screen printing is best for large orders but has high setup costs. For small businesses and hobbyists, DTF offers the best balance of quality, versatility, and affordability.
Frequently Asked Questions About DTF Printing
Do I need a special printer for DTF printing?
You can convert a standard inkjet printer (like an Epson EcoTank) to use DTF inks, but dedicated DTF printers are more reliable and produce consistent results. They handle white ink and frequent use better.
How long do DTF prints last?
With proper application and care, DTF prints can last as long as the garment itself. They withstand 50+ washes without significant fading if washed inside out in cold water.
Can I use DTF on dark and light fabrics?
Absolutely. DTF works on both. The white ink layer ensures colors remain vibrant on dark materials, while on light fabrics, you can skip the white layer for a softer feel.
Is DTF printing safe for children's clothing?
Yes, as long as you use non-toxic, CPSIA-compliant inks and powders. Always check the manufacturer's safety data sheets.
What's the best way to store DTF transfers?
Store them in a cool, dry place away from direct sunlight. Keep them flat to prevent curling. Properly stored transfers can last for months.
Now that you have a solid understanding of DTF printing, it's time to put it into practice. Start with a simple design, follow the steps, and don't be discouraged by initial hiccups. With a bit of experimentation, you'll be creating stunning custom apparel that impresses everyone. Happy printing!